
- SwiftUIプロジェクトの新規作成
- VStackとHStackとZStack
- Xcodeで定義されている要素の内容や説明をみる
- VStackのサンプルコード
- HStackのサンプルコード
- ZStackのサンプルコード
- SwiftUIでのprint関数の使い方
- SwiftUI内でのfor文の使い方
- SwiftUI内でのForEach文の使い方
- SwiftUIのボタンタップでテキストを変更する
- SwiftUIのリストの基本形
- SwiftUIのリストにセクションを追加
- SwiftUIのリストにナビバーを追加
- SwiftUIでナビゲーションによる画面遷移
- SwiftUIのモーダルビュー
- SwiftUIのモーダルフルスクリーン
- SwiftUIでナビバーを非表示にして、戻る。
- NavigationStackとよる画面遷移
- ButtonによるViewの入れ替え
- SwiftUIのCharts(iOS16〜)
- SwiftUIのChartsのBarMarkの積層(iOS16〜)
- SwiftUIのChartsのBarMarkの並列(iOS16〜)
- SwiftUIのテキストフィールド付きのAlert
- SwiftUIのPickerの横向き
- UIKit内でSwiftUIを表示する
- SwiftUIでの図形表示
- SwiftUIでつまんで動かす
- SwiftUIでの時間付きアニメーション
- SwiftUIのToggleによるアニメーション
- SwiftUIのボタンのアニメーション
- SwiftUIにおけるボタンエフェクト
- SwiftUIの.timingCurve
- SwiftUIのアニメーションの演習
- RealityKitとSwiftUIで、球体とボックスと平面を表示する。
- RealityKitとSwiftUIで、文字オブジェクトを表示する。
- RealityKitとSwiftUIで、usdzファイルを表示する。端末基準。
- RealityKitとSwiftUIで、usdzファイルを表示する。平面基準。
- RealityKitとSwiftUIで、3つのusdzファイルを表示する。平面基準。
SwiftUIプロジェクトの新規作成
1。Xcodeを起動する。
2。「Create New Project」をクリック。
3。上のタブのiOSを選択する。(iOSアプリを作成すれば、ipad、mac、VisionProでも配信できる)
3。「App」を選択し、「next」をクリック。
4。プロジェクトの項目を入力する。
- Product Name:プロジェクト名。(自分がわかりやすいもの)
- Team:開発者登録をしていないのであれば「None」のまま。登録していればApple IDの名前。
- Organization Identifier:開発者(組織)の識別子。他と被らないように、自分のwebサイトアドレスを逆転したものが推奨されている。(例:com.xxxxxxxx)
- Bundle Identifier:上の情報から自動生成される。後で変更することができる。アプリを配信する場合は、この識別子に対して配布証明書を作成する。
- Interface:「SwiftUI」を選択。
- Language:「Swift」
- Strage:「None」
- Host in CloudKit:初期設定のまま「チェックなし」
- Include Tests:後から追加できるので「チェックなし」。テストファイルを作成するかどうか。
- 「Next」をクリック。
- Create Git repository on my Mac:「チェックなし」。リポジトリとは、ファイルやディレクトリの状態を記録する場所のこと。gitを使用しないのであれば、チェックを外す。
- ファイルを保存先を選択し、「Create」をクリック。
5。Xcodeのプロジェクトが起動される。左上の再生ボタンで、シュミレーター上で動作させてみる。
import SwiftUI

struct ContentView: View {
    var body: some View {
        VStack {
            Image(systemName: "globe")
                .imageScale(.large)
                .foregroundStyle(.tint)
            Text("Hello, world!")
        }
        .padding()
    }
}

#Preview {
    ContentView()
}
VStackとHStackとZStack
1。レイアウトコードは基本的に「var body: some View」の中に書いていく。
2。VStack:縦方向(Vertical:垂直、Stack:積み重ね)
3。HStack:横方向(Horizon:水平)
4。ZStack:奥行き(Z:Z軸)
import SwiftUI

struct ContentView: View {
    var body: some View {

        //縦方向、上から下へ。
        VStack {
            Text("縦その1")
            Text("縦その2")
        }

        //横方向、左から右へ。
        HStack {
            Text("横その1")
            Text("横その2")
        }

        //奥行き方向、奥から手前へ。
        ZStack {
            Text("奥行きその1")
            Text("奥行きその2")
        }

    }
}


//右サイドのプレビューを実施している。
#Preview {
    ContentView()
}
Xcodeで定義されている要素の内容や説明をみる
「VStack」のコード上で、option + クリックすると、要素の説明と簡単なサンプルが表示される。
「VStack」のコード上で、command + クリックすると、要素を宣言しているコードが表示される。
VStackのサンプルコード
import SwiftUI

struct ContentView: View {
    var body: some View {
        VStack(alignment: .trailing, spacing: 10)
        {
            ForEach(1...10, id: \.self)
            {
                Text("Item \($0)")
            }
        }
    }
}


//右サイドのプレビューを実施している。
#Preview {
    ContentView()
}| alignment(並べること) (デフォルトは.center) | |
| .leading | 左合わせ |
| .center | センター合わせ |
| .trailing | 右合わせ |
| spacing(CGFloat) (デフォルトはnull) | |
| 要素と要素の間の余白 | |
| マイナスにすると順番が逆になる | |
HStackのサンプルコード
import SwiftUI

struct ContentView: View {
    var body: some View {
        HStack(alignment: .top, spacing: 10
        ) {
            ForEach(1...5, id: \.self) {
                Text("Item \($0)")
            }
        }
    }
}


//右サイドのプレビューを実施している。
#Preview {
    ContentView()
}| alignment(並べること) (デフォルトは.center) | |
| .top | 上合わせ |
| .center | センター合わせ |
| .bottom | 下合わせ |
| .firstTextBaseline | 最初の文字のベースラインを合わせる |
| .lastTextBaseline | 最後の文字のベースラインを合わせる |
| spacing(CGFloat) (デフォルトはnull) | |
| 要素と要素の間の余白 | |
| マイナスにすると順番が逆になる | |
ZStackのサンプルコード
import SwiftUI

struct ContentView: View {

        let colors: [Color] = [.red, .orange, .yellow, .green, .blue, .purple]


        var body: some View {
            ZStack {
                ForEach(0..<colors.count) {
                    Rectangle()
                        .fill(colors[$0])
                        .frame(width: 100, height: 100)
                        .offset(x: CGFloat($0) * 10.0,
                                y: CGFloat($0) * 10.0)
                }
            }
        }
}


//右サイドのプレビューを実施している。
#Preview {
    ContentView()
}
SwiftUIでのprint関数の使い方
import SwiftUI

struct ContentView: View {


    var body: some View {
        VStack {
        }
        .onAppear{
            //onAppear内であれば、print関数が使用できる。
            print("東京")
            //東京
        }
    }
}


#Preview {
    ContentView()
}
SwiftUI内でのfor文の使い方
import SwiftUI

struct ContentView: View {


    var body: some View {
        VStack {
        }
        .onAppear{
            //onAppear内であれば、print関数が使用できる。
            let stringArray:[String] = ["東京", "大阪", "福岡"]
            for number in stringArray.indices {
                print(stringArray[number])
            }
            //東京
            //大阪
            //福岡
        }
    }
}


#Preview {
    ContentView()
}
SwiftUI内でのForEach文の使い方
ForEach文で要素を繰り返し作成することができる。
「Non-constant range: not an integer range」のアラートが出たら、「, id: \.self」を追加する。
import SwiftUI
struct ContentView: View {
let stringArray:[String] = ["東京", "大阪", "福岡","沖縄"]
var body: some View {
//VStack内は「@ViewBuilder」という、ビューを構築する部分なので、for文は使用できない。
VStack {
ForEach(stringArray.indices, id: \.self) {
Text(stringArray[$0])
}
}
}
}
#Preview {
ContentView()
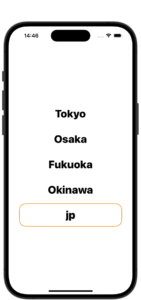
}SwiftUIのボタンタップでテキストを変更する
import SwiftUI


var MainStringArray:[String] = ["東京", "大阪", "福岡","沖縄"]

struct ContentView: View {


    @State var bottomTap = false
    @State var buttonTitle = "en"
    @State var buttonBackGroundColor:Color = .mint
    @State var stringArray = MainStringArray


    var body: some View {
        VStack {

            //テキスト群
            ForEach(stringArray.indices, id: \.self) {
                Text(stringArray[$0])
            }
            .padding()


            //ボタン、枠線付き。
            Button(action: {
                buttonAction()
            }) {
                Text(buttonTitle)
                    .accentColor(Color.primary)
                    //.background(buttonBackGroundColor)
                    .padding()
                    .frame(width: UIScreen.main.bounds.size.width - 100, height: 40)
                    .shadow(color: .gray, radius: 1, x: 0, y: 0)
            }
            .padding()
            //.background(buttonBackGroundColor)
            .cornerRadius(20)
            .overlay(
                RoundedRectangle(cornerRadius: 20)
                .stroke(buttonBackGroundColor, lineWidth: 2)
            )
        }
    }


    //ボタンアクション
    private func buttonAction(){
        if bottomTap == false {
            bottomTap = true
            buttonTitle = "jp"
            MainStringArray = ["Tokyo", "Osaka", "Fukuoka","Okinawa"]
            stringArray = MainStringArray
            buttonBackGroundColor = .orange
        } else {
            bottomTap = false
            buttonTitle = "en"
            MainStringArray = ["東京", "大阪", "福岡","沖縄"]
            stringArray = MainStringArray
            buttonBackGroundColor = .mint
        }
        print(stringArray)
    }
}


#Preview {
    ContentView()
}
SwiftUIのリストの基本形
import SwiftUI

struct ContentView: View {

    let areaName = ["東京", "大阪", "福岡", "沖縄"]
    var body: some View {

        List {
            ForEach(areaName.indices, id: \.self) {
                Text(areaName[$0])
            }
        }
    }
}

#Preview {
    ContentView()
}
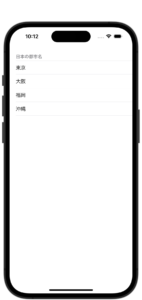
SwiftUIのリストにセクションを追加
import SwiftUI

struct ContentView: View {

    let areaName = ["東京", "大阪", "福岡", "沖縄"]
    var body: some View {

        List {
            Section(header: Text("日本の都市名")) {
                ForEach(areaName.indices, id: \.self) {
                    Text(areaName[$0])
                }
            }
        }
        .listStyle(InsetListStyle())//セルと近いセクションデザイン。
        //.listStyle モディファイア一覧。
        //.listStyle(DefaultListStyle())//デフォルト
        //.listStyle(InsetGroupedListStyle())//デフォルトに近いデザイン。
        //.listStyle(PlainListStyle())//セルと近いセクションデザイン。
        //.listStyle(InsetListStyle())//セルと近いセクションデザイン。
        //.listStyle(GroupedListStyle())//設定画面に近いスタイル
        //.listStyle(SidebarListStyle())//折りたたみデザイン。
    }
}

#Preview {
    ContentView()
}
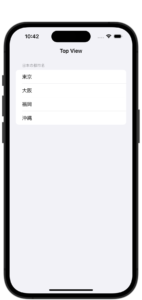
SwiftUIのリストにナビバーを追加
import SwiftUI

struct ContentView: View {

    let areaName = ["東京", "大阪", "福岡", "沖縄"]

    var body: some View {
        NavigationStack {

            List {
                Section(header: Text("日本の都市名")) {
                    ForEach(areaName.indices, id: \.self) {
                        Text(areaName[$0])
                    }
                }
            }

            .navigationTitle("Top View")
            .navigationBarTitleDisplayMode(.inline)//表示スタイル
        }
    }
}

#Preview {
    ContentView()
}
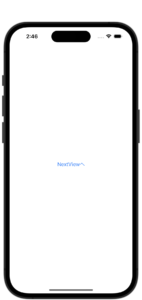
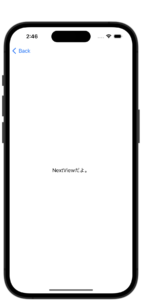
SwiftUIでナビゲーションによる画面遷移
import SwiftUI

struct ContentView: View {
    var body: some View {

        NavigationStack {
            NavigationLink {
                nextView()
            } label: {
                Text("NextViewへ")
            }
        }
    }
}


struct nextView: View {
    var body: some View {
            Text("NextViewだよ。")
    }
}


#Preview {
    ContentView()
}
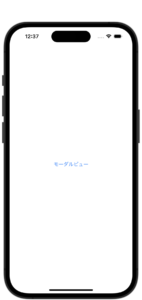
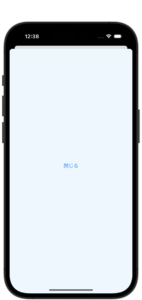
SwiftUIのモーダルビュー
import SwiftUI


struct ContentView: View {

    @State private var present = false

    var body: some View {

        Button("モーダルビュー") {
            present = true
        }
        .sheet(isPresented: $present) {
            ModalView()
        }

    }

}


struct ModalView: View {

    @Environment(\.dismiss) private var dismiss

    var body: some View {

        Button("閉じる") {
            dismiss()
        }
        .frame(maxWidth: .infinity, maxHeight: .infinity)
        .background(Color.cyan.opacity(0.1))

    }

}


#Preview {
    ContentView()
}
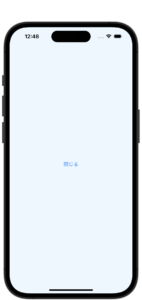
SwiftUIのモーダルフルスクリーン
import SwiftUI


struct ContentView: View {

    @State var present = false

    var body: some View {

        Button("モーダルフルスクリーン"){
            present = true
        }
        .fullScreenCover(isPresented: $present, onDismiss: didDismiss) {
            ModalFullScreen(present2: $present)
        }

    }

    func didDismiss() {
        print("モーダルフルスクリーンが閉じたよ。")
    }

}


struct ModalFullScreen: View {

    @Binding var present2: Bool

    var body: some View {

        Button("閉じる") {
            present2 = false
        }
        .frame(maxWidth: .infinity, maxHeight: .infinity)
        .background(Color.cyan.opacity(0.1).edgesIgnoringSafeArea(.all))

    }

}


#Preview {
    ContentView()
}
SwiftUIでナビバーを非表示にして、戻る。
import SwiftUI


struct ContentView: View {
    var body: some View {

        NavigationView {
            NavigationLink(destination: nextView()) {
                Text("nextViewへ。")
            }
        }

    }
}


struct nextView: View {

    @Environment(\.presentationMode) var nextScreen

    var body: some View {
        Button("戻る"){
            self.nextScreen.wrappedValue.dismiss()
        }
        .navigationBarHidden(true)
    }

}


#Preview {
    ContentView()
}
NavigationStackとよる画面遷移
順番に画面遷移し、戻るで最初の画面に戻る。
import SwiftUI


var CountryArray:[String] = ["Japan", "America", "England"]

var CityTwoDimArray:[[String]] = [
    ["Tokyo", "Osaka", "Fukuoka"],
    ["Los Angeles", "New York", "Seattle"],
    ["London", "Cambridge", "Glasgow"]
]


struct FirstView: View {

    @State var sectionNumber = 0
    @State var goToSecondView = false

    var body: some View {
        NavigationStack {
            List {
                ForEach(CountryArray.indices, id: \.self) {section in
                    Button(CountryArray[section]) {
                        sectionNumber = section
                        goToSecondView = true
                    }
                    .foregroundColor(.primary)
                }
                .navigationDestination(isPresented: $goToSecondView) {
                    SecondView(sectionNumber: sectionNumber)
                }
            }
            .navigationTitle("Country List")
        }
    }
}


struct SecondView:View{

    var sectionNumber = 0
    @State var rowNumber = 0
    @State var goToThirdView = false

    var body: some View {
        NavigationStack{
            List {
                ForEach(CityTwoDimArray[sectionNumber].indices, id: \.self) {row in
                    Button(CityTwoDimArray[sectionNumber][row]) {
                        rowNumber = row
                        goToThirdView = true
                    }
                    .foregroundColor(.primary)
                }
                .navigationDestination(isPresented: $goToThirdView) {
                    ThirdView()
                }
            }
            .navigationTitle("City List")
        }
    }
}


struct ThirdView:View{

    @Environment(\.presentationMode) var thisScreen

    var body: some View {
        Button("戻る"){
            self.thisScreen.wrappedValue.dismiss()
        }
        .foregroundColor(.primary)
    }
}


#Preview {
    FirstView()
}
ButtonによるViewの入れ替え
import SwiftUI


struct ContentView: View {


    @State var showViewName = "OrangeView"

    var body: some View {
        VStack {

            Spacer()

            //ここでviewの入れ替え。
            VStack {
                if showViewName == "OrangeView" {
                    OrangeView()
                } else if showViewName == "CyanView" {
                    CyanView()
                } else if showViewName == "PinkView" {
                    PinkView()
                }
            }
            //.frame(maxWidth: .infinity, minHeight: UIScreen.main.bounds.height - 176)

            Spacer()

            //ここからボタン。
            HStack (){
                Spacer()
                Button(action: {
                    showViewName = "OrangeView"
                }) {
                    Image(systemName: "circle.fill")
                }
                .foregroundColor(.orange)

                Spacer()

                Button(action: {
                    showViewName = "CyanView"
                }) {
                    Image(systemName: "circle.fill")
                }
                .foregroundColor(.cyan)

                Spacer()

                Button(action: {
                    showViewName = "PinkView"
                }) {
                    Image(systemName: "circle.fill")
                }
                .foregroundColor(.pink)

                Spacer()

            }
            .font(.system(size: 25))
            .frame(maxWidth: .infinity, minHeight: 54.0)
            .background(Color.gray.opacity(0.2)) // OK
        }


        .onChange(of: showViewName) {
            print(showViewName)
        }

    }
}


struct OrangeView: View {
    var body: some View {
        Text("OrangeView")
            .foregroundColor(.orange)
            .font(.system(size:35))
            .fontWeight(.black)
    }
}


struct CyanView: View {
    var body: some View {
        Text("CyanView")
            .foregroundColor(.cyan)
            .font(.system(size:35))
            .fontWeight(.black)
    }
}


struct PinkView: View {
    var body: some View {
        Text("PinkView")
            .foregroundColor(.pink)
            .font(.system(size:35))
            .fontWeight(.black)
    }
}


#Preview {
    ContentView()
}
SwiftUIのCharts(iOS16〜)
import SwiftUI
import Charts


struct ContentView: View {


    //表の基礎のなるリスト。
    @State var priceList:[[Any]] = [
        ["りんご", 200, Color(#colorLiteral(red: 1, green: 0.1857388616, blue: 0.5733950138, alpha: 1))],
        ["なし", 300, Color(#colorLiteral(red: 1, green: 0.4932718873, blue: 0.4739984274, alpha: 1))],
        ["みかん", 300, Color(#colorLiteral(red: 1, green: 0.8323456645, blue: 0.4732058644, alpha: 1))],
        ["スイカ", 1800, Color(#colorLiteral(red: 0.9995340705, green: 0.988355577, blue: 0.4726552367, alpha: 1))],
        ["ぶどう", 800,  Color(#colorLiteral(red: 0.8321695924, green: 0.985483706, blue: 0.4733308554, alpha: 1))],
        ["シャインマスカット", 1500, Color(#colorLiteral(red: 0.4500938654, green: 0.9813225865, blue: 0.4743030667, alpha: 1))],
        ["クランベリー", 800, Color(#colorLiteral(red: 0.4508578777, green: 0.9882974029, blue: 0.8376303315, alpha: 1))],
    ]


    var body: some View {

        Chart {
            ForEach(priceList.indices, id: \.self) { num in
                BarMark(
                    x: .value("fruit", priceList[num][0] as! String),
                    y: .value("Price", priceList[num][1] as! Int)
                )
                .foregroundStyle(by: .value("Shape Color", priceList[num][0] as! String))
            }
        }
        .chartForegroundStyleScale(range: graphColors(priceList:priceList))
        .padding()


        HStack (){
            Spacer()

            Button(action: {
                PulusButtonAction()
            }) {
                Image(systemName: "plus.circle")
            }
            .foregroundColor(.orange)
            Spacer()

            Button(action: {
                MinusButtonAction()
            }) {
                Image(systemName: "minus.circle")
            }
            .foregroundColor(.cyan)
            Spacer()

        }
        .font(.system(size: 25))
    }


    //色の配列を返すファンクション。
    func graphColors(priceList:[[Any]]) -> [Color] {
        var returnColors:[Color] = []
        for number in priceList.indices {
            returnColors.append(priceList[number][2] as! Color)
        }
        return returnColors
    }


    //プラスボタンのアクション。
    func PulusButtonAction(){
        print("プラスボタンだよ。")
        priceList.append(["メロン", 1800, Color(#colorLiteral(red: 0.476841867, green: 0.5048075914, blue: 1, alpha: 1))])
    }


    //マイナスボタンのアクション。
    func MinusButtonAction(){
        print("マイナスボタンだよ。")
        if priceList.count != 0 {
            priceList.removeLast()
        }
    }


}


#Preview {
    ContentView()
}
BarMark
xとyを入れ替えると、横向きになる。
PointMark
RectangleMark
LineMark
.foregroundStyleの行を
.foregroundStyle(.red)に変更する。
SwiftUIのChartsのBarMarkの積層(iOS16〜)
import SwiftUI
import Charts


struct ContentView: View {


    struct kamoku: Identifiable {
        var id = UUID()
        let kamoku: String
        let color: Color
    }


    @State var kamokuList: [kamoku] = [
        kamoku(id: UUID(), kamoku : "国語", color:Color(#colorLiteral(red: 1, green: 0.1857388616, blue: 0.5733950138, alpha: 1))),
        kamoku(id: UUID(), kamoku : "算数", color:Color(#colorLiteral(red: 0.9995340705, green: 0.988355577, blue: 0.4726552367, alpha: 1))),
        kamoku(id: UUID(), kamoku : "理科", color:Color(#colorLiteral(red: 0.2392156869, green: 0.6745098233, blue: 0.9686274529, alpha: 1))),
        kamoku(id: UUID(), kamoku : "社会", color:Color(#colorLiteral(red: 0.4508578777, green: 0.9882974029, blue: 0.8376303315, alpha: 1))),
    ]


    //表の基礎のなるリスト。
    @State var studyList:[[Any]] = [
        ["2023年1月1日", 200,"国語"],
        ["2023年1月1日", 200, "算数"],
        ["2023年1月2日", 300, "理科"],
        ["2023年1月3日", 300, "社会"],
        ["2023年1月3日", 1800, "国語"],
        ["2023年1月3日", 800,  "算数"],
        ["2023年1月4日", 1500, "理科"],
        ["2023年1月5日", 800, "社会"],
    ]


    var body: some View {

        Chart {
            ForEach(studyList.indices, id: \.self) { num in
                BarMark(
                    x: .value("日時", studyList[num][0] as! String),
                    y: .value("時間", studyList[num][1] as! Int)
                )
                .foregroundStyle(by: .value("Shape Color", studyList[num][2] as! String))
            }

        }
        .chartForegroundStyleScale(
            domain: kamokuList.map{ $0.kamoku }, range: kamokuList.map{ $0.color }
        )
        .padding()


        HStack (){
            Spacer()

            Button(action: {
                PulusButtonAction()
            }) {
                Image(systemName: "plus.circle")
            }
            .foregroundColor(.orange)
            .font(.system(size: 35))
            Spacer()


            Button(action: {
                SmallPulusButtonAction()
            }) {
                Image(systemName: "plus")
            }
            .foregroundColor(.orange)
            .font(.system(size: 25))
            Spacer()

        }
        .font(.system(size: 25))
    }


    //プラスボタンのアクション。
    func PulusButtonAction(){
        print("プラスボタンだよ。")
        studyList.append(["2023年1月6日", 1200, "国語"])
    }


    //マイナスボタンのアクション。
    func SmallPulusButtonAction(){
        print("スモールプラスボタンだよ。")
        kamokuList.append(kamoku(id: UUID(), kamoku : "英語", color:.red))
    }

}

//

#Preview {
    ContentView()
}
SwiftUIのChartsのBarMarkの並列(iOS16〜)
import SwiftUI
import Charts


struct ContentView: View {


    struct kamoku {
        var kamoku: String
        var color: Color
    }


    @State var kamokuList: [kamoku] = [
        kamoku(kamoku : "国語", color:Color(#colorLiteral(red: 1, green: 0.1857388616, blue: 0.5733950138, alpha: 1))),
        kamoku(kamoku : "数学", color:Color(#colorLiteral(red: 1, green: 0.8323456645, blue: 0.4732058644, alpha: 1))),
        kamoku(kamoku : "社会", color:Color(#colorLiteral(red: 0.8321695924, green: 0.985483706, blue: 0.4733308554, alpha: 1))),
    ]


    struct StudyRecord: Identifiable {
        var id = UUID()
        var date: String
        var kamoku: String
        var time: Int
    }


    @State var StudyList:[StudyRecord] = [
        StudyRecord(id: UUID(), date : "2023年1月4日", kamoku : "国語", time : 800),
        StudyRecord(id: UUID(), date : "2023年1月4日", kamoku : "数学", time : 1000),
        StudyRecord(id: UUID(), date : "2023年1月4日", kamoku : "社会", time : 1200),
        StudyRecord(id: UUID(), date : "2023年1月5日", kamoku : "国語", time : 1800),
        StudyRecord(id: UUID(), date : "2023年1月5日", kamoku : "数学", time : 1200),
        StudyRecord(id: UUID(), date : "2023年1月5日", kamoku : "社会", time : 700),
        StudyRecord(id: UUID(), date : "2023年1月6日", kamoku : "国語", time : 1200),
        StudyRecord(id: UUID(), date : "2023年1月6日", kamoku : "数学", time : 3000),
        StudyRecord(id: UUID(), date : "2023年1月6日", kamoku : "社会", time : 3300),
    ]


    var body: some View {

        Chart {
            ForEach(StudyList) { StudyList in
                BarMark(
                    x: .value("日時", StudyList.date),
                    y: .value("時間", StudyList.time)
                )
                .foregroundStyle(by: .value("kamoku", StudyList.kamoku))
                .position(by: .value("kamoku", StudyList.kamoku))
            }
        }
        .chartForegroundStyleScale(domain: kamokuList.map{ $0.kamoku }, range: kamokuList.map{ $0.color })
        .padding()


        HStack (){
            Spacer()

            Button(action: {
                PulusButtonAction()
            }) {
                Image(systemName: "plus.circle")
            }
            .foregroundColor(.orange)
            .font(.system(size: 35))
            Spacer()


            Button(action: {
                SmallPulusButtonAction()
            }) {
                Image(systemName: "plus")
            }
            .foregroundColor(.orange)
            .font(.system(size: 25))
            Spacer()

        }
        .font(.system(size: 25))
    }


    //プラスボタンのアクション。
    func PulusButtonAction(){
        print("プラスボタンだよ。")
        StudyList.append(StudyRecord(id: UUID(), date : "2023年1月7日", kamoku : "国語", time : 1200))
        StudyList.append(StudyRecord(id: UUID(), date : "2023年1月7日", kamoku : "数学", time : 800))
        StudyList.append(StudyRecord(id: UUID(), date : "2023年1月7日", kamoku : "社会", time : 1000))
        //StudyList.append(StudyRecord(id: UUID(), date : "2023年1月7日", kamoku : "理科", time : 1000))
    }


    //マイナスボタンのアクション。
    func SmallPulusButtonAction(){
        print("スモールプラスボタンだよ。")
        kamokuList.append(kamoku(kamoku : "理科",color:.red))
    }


}


#Preview {
    ContentView()
}
SwiftUIのテキストフィールド付きのAlert
import SwiftUI


struct ContentView: View {


    @State var textFieldString = ""
    @State var showAlert: Bool = false


    var body: some View {

        Button("alert") {
            textFieldString = ""
            showAlert = true
        }

        .alert("Alert", isPresented: $showAlert) {
            TextField("Passcode", text: $textFieldString)

            Button("OK") {
                showAlert = false
                print("OK \(textFieldString)\(showAlert)")
            }

            Button("Cancel", role: .cancel){
                showAlert = false
                print("Cancel \(textFieldString)\(showAlert)")
            }

        }

    }

}


#Preview {
    ContentView()
}
SwiftUIのPickerの横向き
import SwiftUI


struct ContentView: View {


    @State var Imageviews = [
        Image(systemName: "bicycle"),
        Image(systemName: "car"),
        Image(systemName: "bus"),
        Image(systemName: "lightrail"),
        Image(systemName: "airplane"),
    ]


    @State private var indexNumber = 0


    var body: some View {

        VStack {
            Picker(selection: $indexNumber, label: Text("")) {
                ForEach(Imageviews.indices, id: \.self) { indexNumber in
                    Imageviews[indexNumber]
                }
            }
            .pickerStyle(SegmentedPickerStyle())
        }

    }


}


#Preview {
    ContentView()
}
UIKit内でSwiftUIを表示する
import UIKit
import SwiftUI


class SecondViewController: UIViewController {


    override func viewDidLoad() {
        super.viewDidLoad()

        let vc: UIHostingController = UIHostingController(rootView: SubView())
        self.addChild(vc)
        self.view.addSubview(vc.view)
        vc.didMove(toParent: self)

        vc.view.translatesAutoresizingMaskIntoConstraints = false
        //vc.view.heightAnchor.constraint(equalToConstant: 320).isActive = true
        vc.view.bottomAnchor.constraint(equalTo: self.view.bottomAnchor, constant: 0).isActive = true
        vc.view.topAnchor.constraint(equalTo: self.view.topAnchor, constant: 0).isActive = true
        vc.view.leftAnchor.constraint(equalTo: self.view.leftAnchor, constant: 0).isActive = true
        vc.view.rightAnchor.constraint(equalTo: self.view.rightAnchor, constant: 0).isActive = true
        //vc.view.centerYAnchor.constraint(equalTo: self.view.centerYAnchor).isActive = true
    }


    struct SubView : View {

        var body: some View {
            List {
                ForEach(0...15, id: \.self) {
                    Text("\($0)")
                }
            }
        }
    }


}
SwiftUIでの図形表示
import SwiftUI


struct ContentView: View {
    var body: some View {

        List() {
            //四角
            Rectangle()
                .fill(.orange)
                .frame(width:300, height: 100)

            //グラデーション
            let gradient = LinearGradient(gradient: Gradient(colors: [.pink, .orange]), startPoint: .topLeading, endPoint: .bottomTrailing)
            Rectangle()
                .fill(gradient)
                .frame(width:300, height: 100)

            //角丸
            RoundedRectangle(cornerRadius: 30)
                .fill(.pink)
                .frame(width:300, height: 100)
                .overlay(Text("momo")
                    .foregroundColor(.white))
                    .font(.title)

            //角丸の変形
            RoundedRectangle(cornerSize: .init(width: 100, height: 20))
                .fill(Color.red)
                .frame(width:300, height: 100)

            //カプセル
            Capsule()
                .fill(gradient)
                .frame(width:300, height: 100)

            //丸
            Circle()
                .fill(Color.orange)
                .frame(width:100, height: 100)

            //楕円
            Ellipse()
                .fill(Color.pink)
                .frame(width:200, height: 100)

        }
    }

}

#Preview {
    ContentView()
}
SwiftUIでつまんで動かす
import SwiftUI


struct ContentView: View {

    @State var center = CGPoint.zero

    var body: some View {

        VStack {

            Text("🍎")
                .font(.system(size: 50))
                .frame(width: 50, height: 50)
                .offset(x: center.x - 25, y: center.y - 25)
                .gesture(
                    DragGesture(minimumDistance: 0).onChanged { value in
                        center = value.location
                    })

        }

    }

}


#Preview {
    ContentView()
}
SwiftUIでの時間付きアニメーション
import SwiftUI


struct ContentView: View {

    @State var kurukuru = true

    var body: some View {
     VStack {
        Text("🍙")
           .font(.system(size: 100))
           .rotationEffect(Angle.degrees(kurukuru ? 0 : 720))
           .animation(Animation.easeInOut(duration:3.0), value: kurukuru)
           .padding()

         Button(action: {
           kurukuru.toggle()
        }) {
           Image(systemName: "arrow.clockwise")
                .font(.system(size: 50))
                .foregroundColor(.secondary)
        }
        .padding()
     }
  }
}


#Preview {
    ContentView()
}
SwiftUIのToggleによるアニメーション
import SwiftUI


struct ContentView: View {

    @State var sizeChangeOn = false

    var body: some View {

        VStack {
            Spacer()

            Circle()
                .fill(sizeChangeOn ? .orange.opacity(0.5) : .orange)
                .frame(width: 200, height: 200)
                .scaleEffect(sizeChangeOn ? 0.5 : 1.0)

            Spacer()

            Circle()
                .fill(sizeChangeOn ? .cyan : .cyan.opacity(0.5))
                .frame(width: 200, height: 200)
                .scaleEffect(sizeChangeOn ? 1.0 : 0.5)

            Spacer()

            Toggle("", isOn: $sizeChangeOn.animation(Animation.easeInOut(duration:2.0)))
                .labelsHidden()
                .tint(.orange)

            Spacer()
        }

    }

}


#Preview {
    ContentView()
}
SwiftUIのボタンのアニメーション
import SwiftUI


struct ContentView: View {

    @State private var treeOn: Bool = false

    var body: some View {
        Button {
            treeOn.toggle()
        } label: {
            VStack{
                Spacer()

                Text("🌲")
                    .font(.system(size: 50))
                    .frame(width: 50, height: 50)
                    .scaleEffect(treeOn ? 6 : 1)
                    .animation(Animation.easeInOut(duration:3.0), value: treeOn)

                Spacer()
            }
        }
    }
}


#Preview {
    ContentView()
}
SwiftUIにおけるボタンエフェクト
import SwiftUI


struct ContentView: View {
    var body: some View {

        Button(action: {

        }) {
            Text("Tap Me !")
        }.buttonStyle(BigButton())

    }
}


struct BigButton: ButtonStyle {
    func makeBody(configuration: Configuration) -> some View {
        configuration.label
            .padding()
            .background(configuration.isPressed ? .pink : .orange)
            .foregroundStyle(.white)
            .clipShape(Capsule())
            .scaleEffect(configuration.isPressed ? 4.0 : 1)
            .animation(.easeOut(duration: 2.0), value: configuration.isPressed)
    }
}

#Preview {
    ContentView()
}
SwiftUIの.timingCurve
import SwiftUI


struct ContentView: View {

    @State private var animate = false

    var body: some View {

        ZStack {

            Circle()
                .frame(width: 220, height: 220)
                .foregroundColor(.gray.opacity(0.3))

            Circle()
                .frame(width: 160, height: 160)
                .foregroundColor(.white)


            Circle()
                .frame(width: 30, height: 30)
                .foregroundColor(Color.orange)
                .offset(y: 95)
                .rotationEffect(.degrees(self.animate ? 540 : 180))
                .animation(
                    Animation//頂点から0.9がスタート。
                        .timingCurve(0.9, 0.2, 0.1, 0.8, duration: 3.3)
                        .repeatForever(autoreverses: false), value: animate
                )


            Circle()
                .frame(width: 20, height: 20)
                .foregroundColor(Color.pink)
                .offset(y: 90)
                .rotationEffect(.degrees(self.animate ? 540 : 180))
                .animation(
                    Animation//頂点から0.9がスタート。
                        .timingCurve(0.9, 0.2, 0.1, 0.8, duration: 4.0)
                        .repeatForever(autoreverses: false), value: animate
                )


        }
        .onAppear() {
            self.animate = true
        }

    }

}


#Preview {
    ContentView()
}
SwiftUIのアニメーションの演習
import SwiftUI
struct ContentView: View {
@State var animationOn = false
var body: some View {
ZStack {
ForEach (1...500, id:\.self) { _ in
Circle ()
.foregroundColor(Color (red: .random(in: 0.0...0.4),
green: .random(in: 0.8...1.0),
blue: .random(in: 0.3...0.7)))
.opacity(.random(in: 0.1...0.2))
.animation (Animation.spring (dampingFraction: 0.5)
.repeatForever()
.speed (.random(in: 0.05...0.4))
.delay(.random (in: 0...1)), value: animationOn
)
.scaleEffect(.random(in: 0.1...2))
.frame(width: .random(in: 15...40),
height: CGFloat.random (in: 15...40),
alignment: .center)
.position(CGPoint(x: .random(in: 0...400),
y: .random (in: 0...834)))
}
}
.opacity(animationOn ? 0.0 : 1.0)
.animation(Animation.easeInOut(duration:3.0),value: animationOn)
.background(.white)
.onTapGesture {
animationOn.toggle()
}
}
}
#Preview {
ContentView()
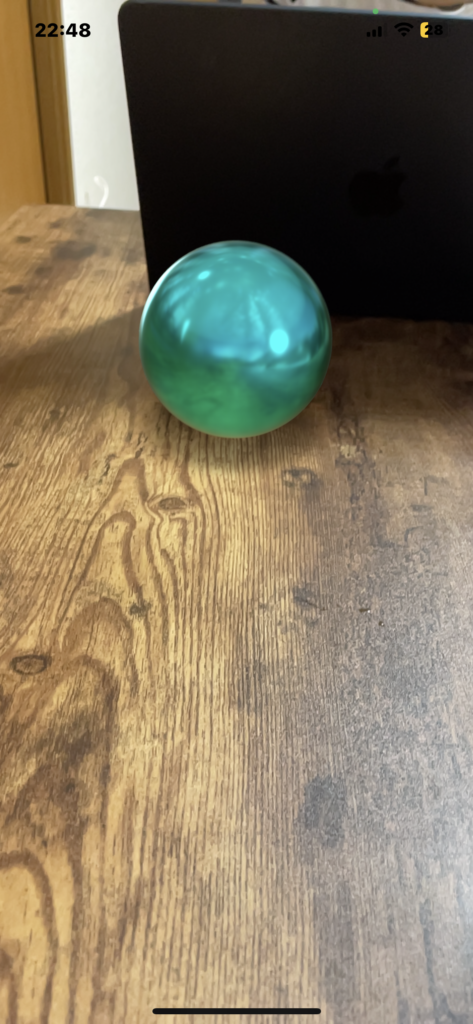
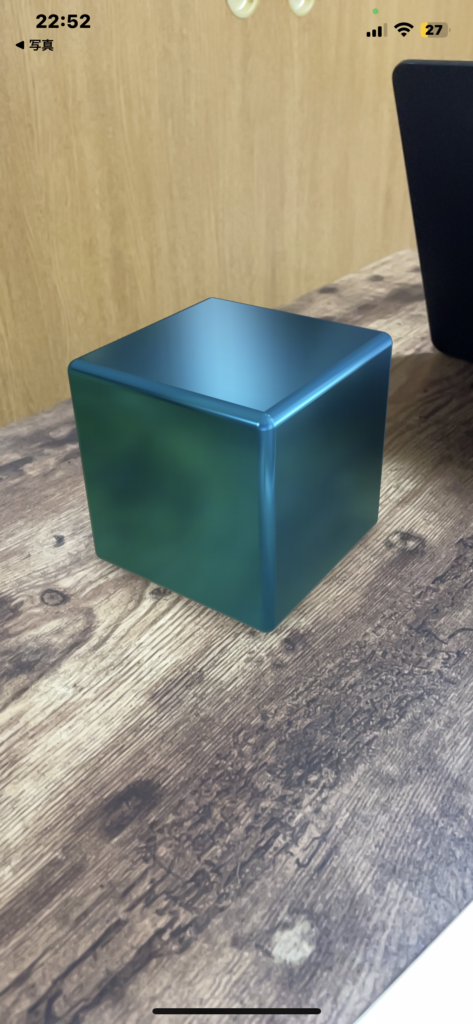
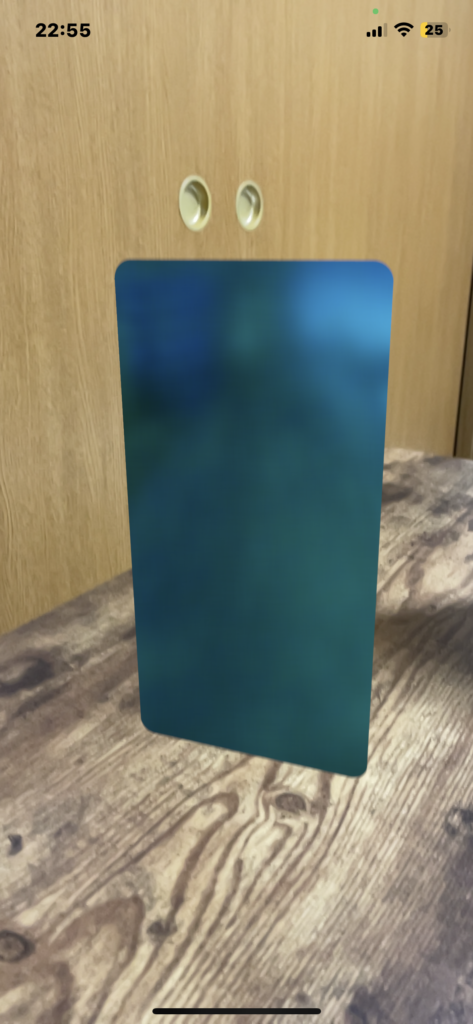
}RealityKitとSwiftUIで、球体とボックスと平面を表示する。
import SwiftUI
import RealityKit

struct ContentView : View {
    var body: some View {
        RealityKitSampleNo1().edgesIgnoringSafeArea(.all)
    }
}


struct RealityKitSampleNo1: UIViewRepresentable {

    func makeUIView(context: Context) -> ARView {

        let arView = ARView(frame: .zero)

        let mesh = MeshResource.generateSphere(radius: 0.051)//球体。
        //let mesh = MeshResource.generateBox(size: 0.1, cornerRadius: 0.005)//box
        //let mesh = MeshResource.generatePlane(width: 0.15, height: 0.30, cornerRadius: 0.010)//平面。

        let material = SimpleMaterial(color: .cyan, roughness: 0.15, isMetallic: true)
        let model = ModelEntity(mesh: mesh, materials: [material])
        model.transform.translation.y = 0.05

        let anchor = AnchorEntity(.plane(.horizontal, classification: .any, minimumBounds: SIMD2<Float>(0.2, 0.2)))
        anchor.children.append(model)

        arView.scene.anchors.append(anchor)

        return arView
    }

    func updateUIView(_ uiView: ARView, context: Context) {

    }

}
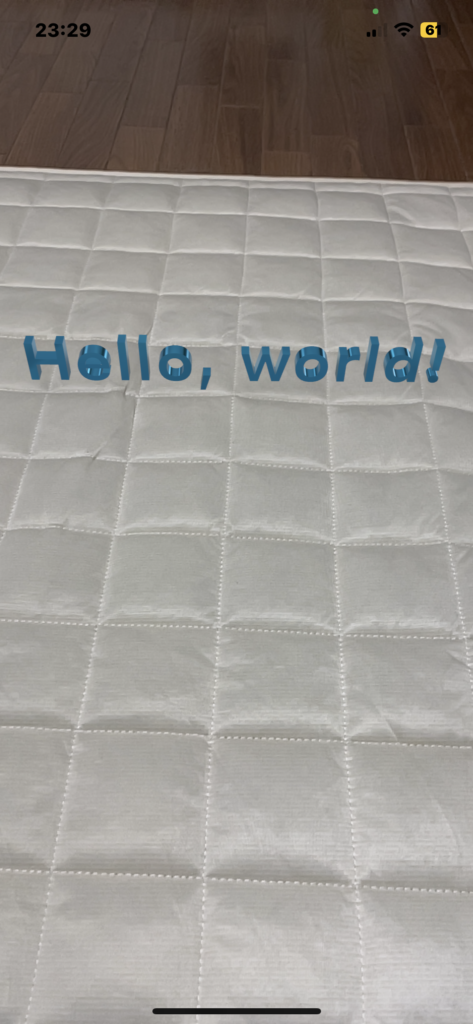
RealityKitとSwiftUIで、文字オブジェクトを表示する。
import SwiftUI
import RealityKit

struct ContentView : View {
    var body: some View {
        RealityKitSampleNo1().edgesIgnoringSafeArea(.all)
    }
}


struct RealityKitSampleNo1: UIViewRepresentable {

    func makeUIView(context: Context) -> ARView {

        let arView = ARView(frame: .zero)

        let textMesh = MeshResource.generateText("Hello, world!", extrusionDepth: 0.1, font: .systemFont(ofSize: 0.5), containerFrame: CGRect.zero, alignment: .left, lineBreakMode: .byTruncatingTail)
        let textMaterial = SimpleMaterial(color: .systemCyan, roughness: 0.0, isMetallic: true)
                let textModel = ModelEntity(mesh: textMesh, materials: [textMaterial])
                textModel.scale = SIMD3<Float>(0.1, 0.1, 0.1)
                textModel.position = SIMD3<Float>(0.0, 0.0, -0.2)

        let anchor = AnchorEntity(.plane(.horizontal, classification: .any, minimumBounds: SIMD2<Float>(0.2, 0.2)))
        anchor.children.append(textModel)

        arView.scene.anchors.append(anchor)

        return arView

    }

    func updateUIView(_ uiView: ARView, context: Context) {}

}
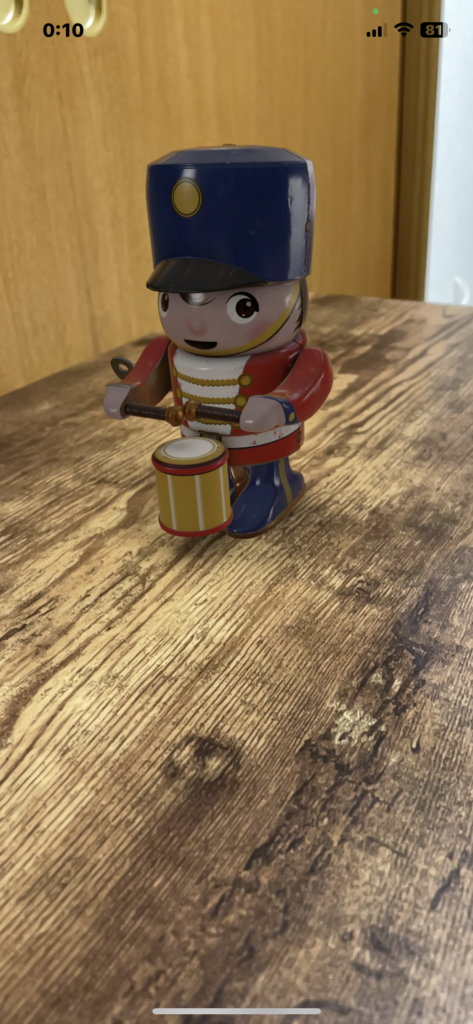
RealityKitとSwiftUIで、usdzファイルを表示する。端末基準。
import SwiftUI
import RealityKit


struct ContentView : View {
    var body: some View {
        RealityKitSampleNo1().edgesIgnoringSafeArea(.all)
    }
}


struct RealityKitSampleNo1: UIViewRepresentable {

    func makeUIView(context: Context) -> ARView {
        let arView = ARView(frame: .zero)
        let filename = "toy_drummer_idle"
        let modelUrl = Bundle.main.url(forResource: filename, withExtension: "usdz")!
        let anchor = AnchorEntity(world: [0, -0.2, -0.2])//自分から見て前方下に配置。

        arView.scene.addAnchor(anchor)

        if let modelEntity = try? ModelEntity.load(contentsOf: modelUrl) {
            modelEntity.scale = SIMD3<Float>(0.01, 0.01, 0.01)
            modelEntity.availableAnimations.forEach {
                modelEntity.playAnimation($0.repeat())
            }

            anchor.addChild(modelEntity)
        }

        return arView
    }

    func updateUIView(_ uiView: ARView, context: Context) {}
}
RealityKitとSwiftUIで、usdzファイルを表示する。平面基準。
import SwiftUI
import RealityKit


struct ContentView : View {
    var body: some View {
        RealityKitSampleNo1().edgesIgnoringSafeArea(.all)
    }
}


struct RealityKitSampleNo1: UIViewRepresentable {

    func makeUIView(context: Context) -> ARView {
        let arView = ARView(frame: .zero)
        let filename = "toy_drummer_idle"
        let modelUrl = Bundle.main.url(forResource: filename, withExtension: "usdz")!
        let anchor = AnchorEntity(.plane(.horizontal, classification: .any, minimumBounds: SIMD2<Float>(0.2, 0.2)))
        //平面を取得して、平面を基準にオブジェクトを配置。
        if let modelEntity = try? ModelEntity.load(contentsOf: modelUrl) {
            modelEntity.scale = SIMD3<Float>(0.01, 0.01, 0.01)
            modelEntity.availableAnimations.forEach {
                modelEntity.playAnimation($0.repeat())
            }
            anchor.addChild(modelEntity)
        }

        arView.scene.addAnchor(anchor)

        return arView
    }

    func updateUIView(_ uiView: ARView, context: Context) {}
}
RealityKitとSwiftUIで、3つのusdzファイルを表示する。平面基準。
Appleの3Dオブジェクトのサンプル
Quick Look Gallery - Augmented Reality - Apple Developer
Embed Quick Look views in your apps and websites to let users see incredible detailed renderings in 3D or AR.
developer.apple.com
import SwiftUI
import RealityKit


struct ContentView : View {
    var body: some View {
        RealityKitSampleNo1().edgesIgnoringSafeArea(.all)
    }
}


struct RealityKitSampleNo1: UIViewRepresentable {

    func makeUIView(context: Context) -> ARView {
        let arView = ARView(frame: .zero)

        let filename = "toy_drummer_idle"
        let modelUrl = Bundle.main.url(forResource: filename, withExtension: "usdz")!
        let anchor = AnchorEntity(.plane(.horizontal, classification: .any, minimumBounds: SIMD2<Float>(0.2, 0.2)))
        if let modelEntity = try? ModelEntity.load(contentsOf: modelUrl) {
            modelEntity.scale = SIMD3<Float>(0.01, 0.01, 0.01)
            modelEntity.availableAnimations.forEach {
                modelEntity.playAnimation($0.repeat())
            }
            //modelEntity.position = [0, -0.15, 0]
            anchor.addChild(modelEntity)
        }


        let filename2 = "Earth_1_12756"
        let modelUrl2 = Bundle.main.url(forResource: filename2, withExtension: "usdz")!
        if let modelEntity = try? ModelEntity.load(contentsOf: modelUrl2) {
            modelEntity.scale = SIMD3<Float>(0.0005, 0.0005, 0.0005)
            modelEntity.availableAnimations.forEach {
                modelEntity.playAnimation($0.repeat())
            }
            modelEntity.position = [0.2, 0.3, 0]
            anchor.addChild(modelEntity)
        }


        let filename3 = "toy_biplane_idle"
        let modelUrl3 = Bundle.main.url(forResource: filename3, withExtension: "usdz")!
        if let modelEntity = try? ModelEntity.load(contentsOf: modelUrl3) {
            modelEntity.scale = SIMD3<Float>(0.01, 0.01, 0.01)
            modelEntity.availableAnimations.forEach {
                modelEntity.playAnimation($0.repeat())
            }
            modelEntity.position = [-0.2, 0.1, 0]
            anchor.addChild(modelEntity)
        }

        arView.scene.addAnchor(anchor)

        return arView
    }

    func updateUIView(_ uiView: ARView, context: Context) {}
}