- Macのストレージがいっぱいになったとき。
- Xcodeのシュミレーターのスクリーンショット
- Macでスクリーン上の選択範囲の動画を撮影する
- swiftで日付の取得
- 遅延処理
- UIButton
- UIColor
- 配列
- AlertController
- webサイトへのリンク
- swiftでメーラーの起動
- XcodeやSimulatorなどのダウンロード先
- Macでファイルパスを取得する方法
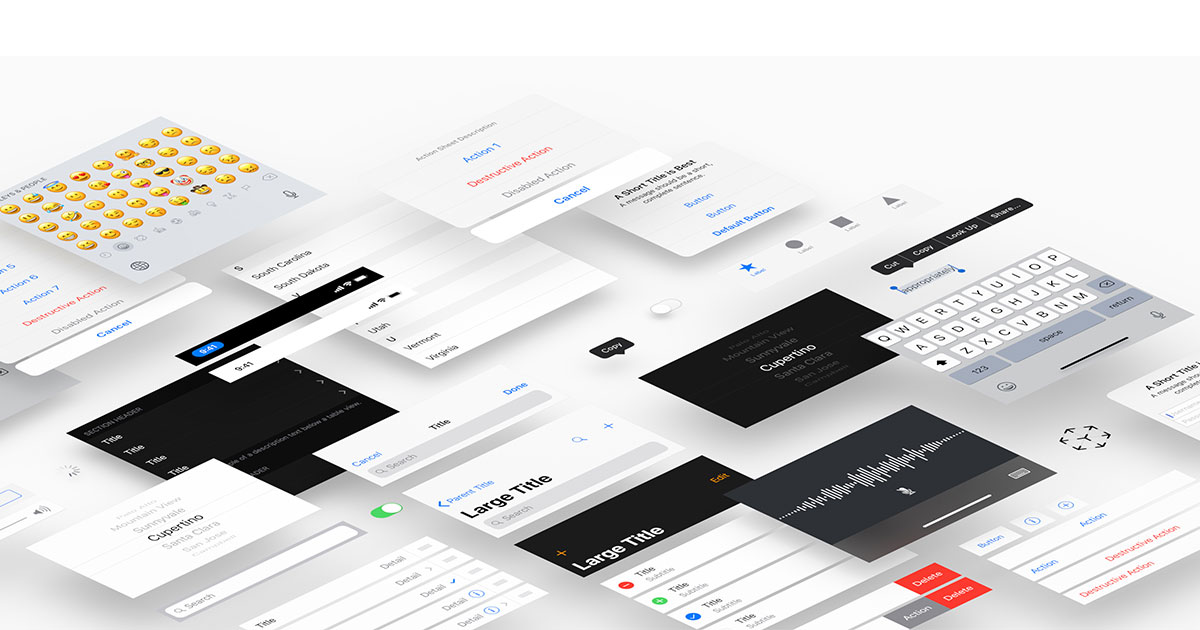
- iPhoneやアップル製品の製品テンプレート
- xcodeから配布用証明書の更新
Macのストレージがいっぱいになったとき。
1。xcode開発していると、ビルドデータでmacのストレージがいっぱいになり、不足します。そんな時は、
2。アップルマーク、システム設定、一般、ストレージに入ると、それぞれのファイルサイズを計算してくれます。
3。デベロッパの部分にとても大きなサイズが表示されます。
4。infoマークを押すと、削除するための表示が出ますので、プロジェクトビルドデータとインデックスを削除、Xcodeキャッシュを削除、デバイスサポートも削除して大丈夫です。デベロッパツール command line toolsはここからでは削除できませんので、ほっといて大丈夫。
Xcodeのシュミレーターのスクリーンショット
1。command + shift + 4、で選択スクリーンショットを起動する。
2。スクショしたいスクリーン上で、スペースキーを押すと、そのスクリーン全体が選択される。
3。そのままクリックすると影付きで撮影できる。
4。影が必要ない場合は、optionキーを押しながら、クリックする。
Macでスクリーン上の選択範囲の動画を撮影する
1。command + shift + 4、で選択範囲を撮影範囲に合わせる。
2。「収録」ボタンを押す。
3。右上の停止ボタンを押す。
swiftで日付の取得
//日付を2024年1月5日形式で取得。"ydMMM"
let dateFormatter = DateFormatter()
dateFormatter.dateFormat = DateFormatter.dateFormat(fromTemplate: "ydMMM", options: 0, locale: Locale(identifier: "ja_JP"))
let today = dateFormatter.string(from: Date())
print(today)

//日付を2024年01月05日形式で取得。"yyyy年MM月dd日"
dateFormatter.dateFormat = "yyyy年MM月dd日"
today = dateFormatter.string(from: Date())
print(today)

//日付からdate型を作成する。
let date2 = dateFormatter.date(from: today)
print(date2!)

//戻したdata型から、再度日付を取得する。
let newday = dateFormatter.string(from: newDate!)
print(newday)
遅延処理
//1秒後に処理する。
DispatchQueue.main.asyncAfter(deadline: .now() + 1.0) { [self] in
    //処理する内容。
}
UIButton
//UIButtonにシステムイメージを入れる。
button.setImage(UIImage(systemName: "pencil.circle"), for: .normal)

//UIButtonにシステムイメージを入れる。scallをsmallにする場合。
button.setImage(UIImage(systemName: "pencil.circle",withConfiguration: UIImage.SymbolConfiguration(scale: .small)), for: .normal)
UIColor
swiftで色を指定する方法。
//UIColorでの色指定。
view.backgroundColor = UIColor.red
view.backgroundColor = .red


//システムカラーは、ライトモードとダークモードにそれぞれに対応するため色が微調整されたもの。
view.backgroundColor = UIColor.systemRed
view.backgroundColor = .systemRed


//RGBでの色指定。
view.backgroundColor = UIColor(red: 30/255, green: 144/255, blue: 255/255, alpha: 1.0)


//Color Literalでの色指定。#colorLiteral()を入力すると、色を選択できる。
view.backgroundColor = #colorLiteral()


//#imageLiteral()を使用すれば、イメージを選択できる。
view.backgroundColor = #imageLiteral()
システムグレイ一覧。
| name | lightモード | darkモード |
| .systemGray |  |  |
| .systemGray2 |  |  |
| .systemGray3 |  |  |
| .systemGray4 |  |  |
| .systemGray5 |  |  |
| .systemGray6 |  |  |
配列
//配列の宣言
var StringArray:[String] = []
StringArray = [ "東京", "大阪", "福岡" ]
print(StringArray[0])

var IntArray:[Int] = []
IntArray = [ 100, 120, 200 ]
print(IntArray[0])

var AnyArray:[Any] = []
AnyArray = [ 100, "東京", "大阪", "福岡" ]
print(AnyArray[1])
print(AnyArray[2])
//多重配列の宣言
var StringTwoDimArray:[[String]] = []
StringTwoDimArray = [[ "東京", "大阪", "福岡" ], [ "名古屋", "姫路" ]]
print(StringTwoDimArray[1])
print(StringTwoDimArray[1][0])


//多重配列の宣言
var StringThreeDimArray:[[[String]]] = []
StringThreeDimArray = [[[ "東京", "大阪" ], [ "名古屋", "姫路" ]], [[ "東京", "大阪" ], [ "沖縄", "北海道" ]]]
print(StringThreeDimArray[1])
print(StringThreeDimArray[1][1])
print(StringThreeDimArray[1][1][1])
AlertController
//アラートの基本形。
let alert = UIAlertController(title: "タイトル", message: "メッセージ", preferredStyle: .alert)
let okButton = UIAlertAction(title: "OK", style: .default, handler: { (action) -> Void in
            //OKボタンを押した時。
})
alert.addAction(okButton)
alert.present(alert, animated: true, completion: nil)


//表示後、自動で消えるアラート。
let oneTimeAlert = UIAlertController(title: "", message: "コピーしました。", preferredStyle: UIAlertController.Style.alert)
self.present(oneTimeAlert, animated: true, completion: {
    DispatchQueue.main.asyncAfter(deadline: .now() + 1.5) {
    oneTimeAlert.dismiss(animated: true)
    }
})


//表示後、自動で消えるアクションアラート。
let oneTimeActionAlert = UIAlertController(title: "", message: "コピーしました。", preferredStyle: UIAlertController.Style.actionSheet)
//アクションアラートのiPad対応。
oneTimeActionAlert.popoverPresentationController?.sourceView = self.view
oneTimeActionAlert.popoverPresentationController?.sourceRect = CGRect(x: view.frame.width/2, y: view.frame.height, width: 0, height: 0)
self.present(oneTimeActionAlert, animated: true, completion: {
    DispatchQueue.main.asyncAfter(deadline: .now() + 1.5) {
    oneTimeActionAlert.dismiss(animated: true)
    }
})


//テキストフィールド付きのアラート。
let textFieldAlert: UIAlertController = UIAlertController(title: "タイトル", message: "テキストフィールド付きアラート", preferredStyle: .alert)
textFieldAlert.addTextField()
let getButton = UIAlertAction(title: "送信する", style: .default) { action in
    let textFieldString = (textFieldAlert.textFields?.first!.text!)!
    print(textFieldString)
}
let cancelButton = UIAlertAction(title: "閉じる", style: .default) { action in
}
textFieldAlert.addAction(getButton)
textFieldAlert.addAction(cancelButton)
self.present(textFieldAlert, animated: true, completion: nil)

//テキストフィールドの動きを検知する必要があればこちらを使用する。
//textFieldAlert.addTextField(configurationHandler: {(textField) -> Void in
//    textField.delegate = self
//})
webサイトへのリンク
//webリンク、アプリの一部として表示。完了ボタンが出るので、こちらの方がアプリに戻りやすい。
import SafariServices

let url = URL(string: "https://www.google.com")
let safariVC = SFSafariViewController(url: url!)
self.present(safariVC, animated: true, completion: nil)


//webリンク。safariのアプリを起動。importを必要としないメリットがある。
let url = URL(string: "https://www.google.com")
UIApplication.shared.open(url!)
swiftでメーラーの起動
//メーラの起動方法その1。基本的にこちらを使用する。メール送信後はアプリに戻る。
import MessageUI

class ViewController: UIViewController, MFMailComposeViewControllerDelegate


    //メーラーの起動。
    if MFMailComposeViewController.canSendMail() {
        let mail = MFMailComposeViewController()
        mail.mailComposeDelegate = self
        mail.setToRecipients(["宛先となるアドレス"])
        mail.setSubject("件名部分のテキスト")
        mail.setMessageBody("本文部分のテキスト", isHTML: false)
        self.present(mail, animated: true, completion: nil)
    } else {
        print("send error")
    }


     //メーラ内の動きを検知する。
    func mailComposeController(_ controller: MFMailComposeViewController, didFinishWith result: MFMailComposeResult, error: Error?) {
        switch result {
        case .cancelled:
            print("キャンセル")
        case .saved:
            print("下書き保存")
        case .sent:
            print("送信成功")
        default:
            print("送信失敗")
        }
        dismiss(animated: true, completion: nil)
    }


//メーラの起動方法その2。openURLとしてメーラーを起動する方法。メール送信後はメール画面が残る。

let sendMailAddress = "宛先となるメールアドレス"
let subjectText = "件名部分のテキスト。"
let mailText = "本文部分のテキスト。"
let URLString = "mailto:\(sendMailAddress)?subject=\(subJectText)&body=\(mailText)"
UIApplication.shared.open(URL(string: URLString)!, options: [:], completionHandler: nil)
XcodeやSimulatorなどのダウンロード先
Macでファイルパスを取得する方法
1。取得したいアイコンを右クリック。
2。optionを押したままにすると、「コピー」が「パス名をコピー」に変化し、コピーできる。
3。ショートカットでは、option + command + c で、ファイルパスがコピーできる。
iPhoneやアップル製品の製品テンプレート

xcodeから配布用証明書の更新
iOS Distribution証明書の期限を更新する方法
「Distribution証明書の有効期限まであと30日です」「現在ご利用のDistribution証明書の有効期限まであと30日になりました。」とメールが来た場合、iOSの配布用の証明書の期限切れが近いことを意味します。
以前は新たに証明書を作成し、キーチェーンへの登録などが必要でしたが、xcode内で簡単にできるようになりました。
上部メニューのXcode内のSettingsを選択。Account、Manage Certificatesを開き、+ボタンを押して、配布用の証明書であるApple Distributionを選択。新しく作成された証明書がKeychainにインストールされ、Developerサイトにも登録される。
新しいmacを購入した場合に必要な証明書のリンクの方法
証明書関係のリンクは、PCを買い替えた場合など、新しいPC上でXcodeを使用する場合にも必要となります。
こちらも、以前は証明書とキーチェーンを起動hしていましたが、xcode上でできるようになりました。
上部メニューのXcode内のSettingsを選択。Account、Manage Certificatesを開き、Manage Certificatesではなく、Download Manual Profilesを選択するだけで、配布用の証明書が新しいPCのKeychainに登録される。
新しいPCなどでビルド時にkeychainへのアクセスが求められる場合は、「常に許可」を選択する。
Archiveしたファイルを再表示する方法
XcodeのWindow内にある、Organizerをクリックすると、アップロード用の画面が出てくる。
app store connect access for is required
アーカイブ時に、「app store connect access for … is required」が出て、アーカイブができない場合は、Macを再起動することでアーカイブができるようになる。
プロジェクト内で複数のアプリ(ターゲット)を作成する
1。Xcode内のプロジェクトアイコンを選択。
2。TARGETS内のアプリ名(例:myAppName1)を右クリック。
3。「Duplicate」(複写という意味)を選択する。
4。TARGETS内にできたアイコンの名前を(例:myAppName2)等に変更する。
アプリ(ターゲット)別の分岐の設定
1。「TARGETS」内のアプリを選択し、「Build Setting」を選択し、「Other Swift Flags」の項目を見つける。(filter検索窓にotherといれ、一番下の方にある)
2。「Other Swift Flags」の行に、「-D」下の行に「アプリ名(ターゲット名)」を入力する。
-D
myAppName1
3。コード内での記述。
var appName = ""

#if myAppName1
appName = "myAppName1"
#endif

#if myAppName2
appName = "myAppName2"
#endif
info.plistの作成とファイルパスの指定
アプリ(ターゲット)を増やした場合、info.plistも複製される場合があります。
一つのinfo.plistファイルを複数のアプリで使用する場合
1。info.plistをすべてのアプリで統一する場合は、新しくできたplistファイルは削除する。
2。ファイルパスを確認しておく。
3。「TARGETS」内のアプリを選択し、「Build Setting」を選択し、「Info.plist File」の項目を見つける。(filter検索窓にinfo.plistといれ、真ん中の下の方にある)
4。同じファイルを指定したいため、コピー前のアプリ(ターゲット)のファイルパスをコピペしておく。
それぞれのアプリで別のinfo.plistを使用する場合
1。アプリを複製すると、info.plistも複製されます。新しいアプリ名に合わせてplistファイルの名前を変更する。
2。「TARGETS」内のアプリを選択し、「Build Setting」を選択し、「Info.plist File」の項目を見つける。(filter検索窓にinfo.plistといれ、真ん中の下の方にある)
3。コピー前のアプリ(ターゲット)のファイルパスをコピペし、ファイル名の部分のみを新しい名前に変更する。
info.plistが複製されず、新たに作成する場合
1。info.plistファイルを選択した状態で、プラスボタンからファイルを追加する。
2。「+」、「File…」、「Property List」、名前を決めて、「create」。
3。中身のないplistファイルができるので、plistファイルを右クリック、「Open As」、「Sourse Code」、XMLのコードが表示されるので、すでにあるものからコピペする。
4。「TARGETS」内のアプリを選択し、「Build Setting」を選択し、「Info.plist File」の項目を見つける。(filter検索窓にinfo.plistといれ、真ん中の下の方にある)
5。コピー前のアプリ(ターゲット)のファイルパスをコピペし、ファイル名の部分のみを新しい名前に変更する。
アプリ(ターゲット)別の分岐のアプリアイコンの設定
1。「Assets」内の「AppIcon」をコピペ。新しいアイコンファイルの名前を変更する。
2。プロジェクトファイルの「TARGETS」内の、アプリを選択。
3。「General」内の「App Icon」から、新しいアイコンファイルをコピペする。
Bundle IdentifierをXcodeから作成する方法
1。developerサイトにログインし、Certificates, Identifiers & Profilesを表示しておく。
2。Xcode内で先ほど複製した新しいアプリ名をTARGETS内で選択する。
3。「Signing & Capabilities」を選択し、「Signing」の「Bundle Identifier」を、指定したい識別子に変更する。
4。違う場所を選択すると、自動的に識別子の証明書が作成される。「Updating provisioning…」みたいなのが表示される。
5。「Automatically manage signing」にチェックがあると、自動で作成されるみたいです。
6。developerサイトの、Certificates, Identifiers & Profilesページを更新する。
7。XCから始まるCertificates, Identifiersが作成されている。該当する識別子を選択し、わかりやすい名前に変更するため、「Description」の欄を変更し、「Save」する。
Xcode内にあるpodをアップデートする
1。プロジェクトファイル内の「profile」ファイルを編集する。
xxxとyyyにはターゲット名。SDKの部分にはインストールするSDK名。
‘14.0’の部分は、対象となるiOS名。
# Uncomment the next line to define a global platform for your project
platform :ios, '14.0'


target 'xxx' do
  # Comment the next line if you don't want to use dynamic frameworks
  use_frameworks!

  # Pods for xxx
pod 'SDK'
end


target 'yyy' do
  # Comment the next line if you don't want to use dynamic frameworks
  use_frameworks!

  # Pods for yyy
pod 'SDK'
end
2。ターミナルを開き、ファイルの場所まで移動する。
cd と 半角スペース後に、プロジェクトファイルをドロップする。
ファイル名を削除するが、/は残す。エンターボタン。
これでファイルの場所に移動できる。
cd3。pod update を入れて、エンターボタン。
pod update4。こんな感じの表示が出れば、無事にアップデート完了。
Pod installation complete! There is 1 dependency from the Podfile and 6 total pods installed.
Apple Developer Programの更新
1。appleから、「Your Apple Developer Program membership expires in 30 days.」のメールが来たら、Apple Developer Programの更新のお知らせです。
2。https://developer.apple.com/account
3。上記のリンク先にログインし、「Apple Developer Programメンバーシップは、あと30日で有効期限が切れます。」の記載があるしたの、「メンバーシップを更新」をクリック。
4。支払いページに進むので、そのまま進める。Apple Developer Programは年間12,980円です。


